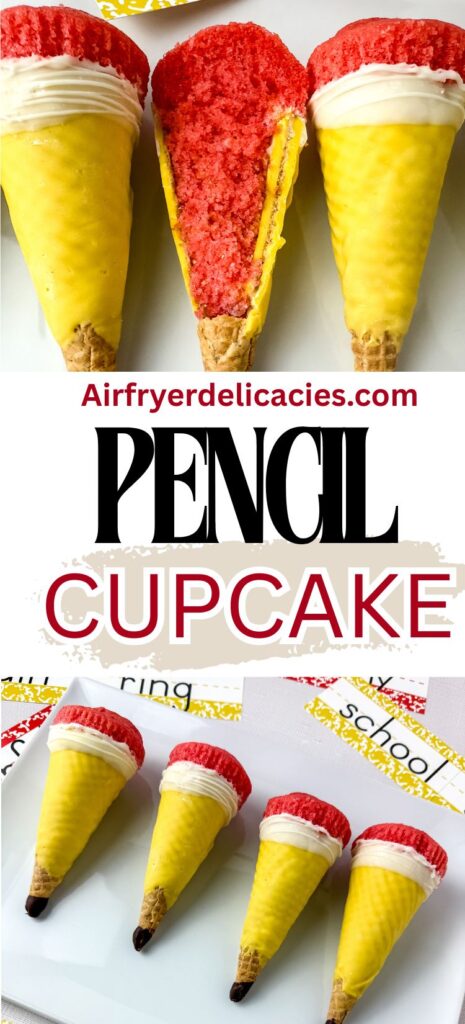
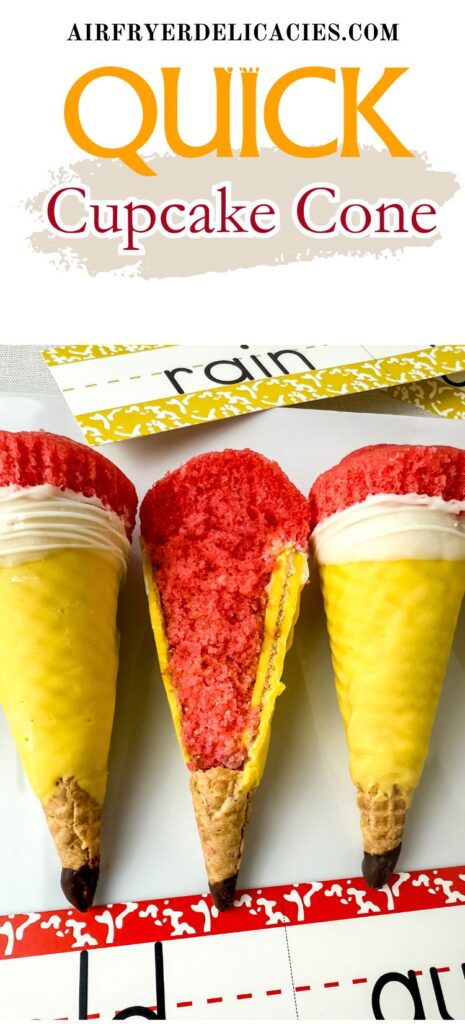
These adorable Pencil Cupcake Cones transform simple cupcakes and waffle cones into a fun back-to-school dessert. Each cone is coated in yellow candy melts, finished with a white chocolate band, topped with a pink cupcake “eraser,” and dipped in chocolate to create the pencil point.
They are perfect for classroom parties, teacher appreciation events, school-themed celebrations, or an after-school treat. You can use homemade cupcakes or save time with store-bought cupcakes.
Equipment
- Piping bags
- Microwave-safe bowls
- Tall cup
- Parchment paper
- Sharp knife
Pro Tips for the Best Pencil Cupcake Cones
- Make sure the bowls, cups, and utensils are completely dry. Even a small amount of water can cause melted chocolate to seize.
- Melt the candy melts in short intervals and stir after each interval to prevent scorching.
- Use a tall, narrow cup for the yellow coating. This makes it easier to cover the waffle cones evenly without using more candy melts than necessary.
- Allow each coating to set before adding the next layer. Handling the cones too soon may leave fingerprints or smudges.
- Place the cones inside tall cups while attaching the cupcakes. This keeps them stable and makes the assembly process easier.
- If the cupcakes are wider than the cones, carefully trim them before slicing. Place the trimmed cake pieces inside the cones so nothing is wasted.
- These treats are best served on the day they are assembled because the cupcakes may gradually soften the waffle cones.
- Do not overfill the cones with cake or treats, as this may make the finished pencils heavy and difficult to handle.
Personalising the Recipe
There are several easy ways to make these Pencil Cupcake Cones your own:
- Change the cupcake flavour. Strawberry creates a naturally pink eraser, but vanilla, chocolate, lemon, or red velvet cupcakes can also be used.
- Use pink, red, or purple candy melts on top of plain cupcakes to create colourful pencil erasers.
- Add sprinkles, mini sweets, chocolate candies, or crushed cookies inside the cones before attaching the cupcakes.
- Pipe thin lines, initials, or short names onto the yellow section once the coating has set.
- Use different colours of candy melts to match a school, birthday party, or celebration theme.
- Make smaller pencils using mini cupcakes and appropriately sized cones.
- Add a small amount of edible glitter or sanding sugar to the cupcake tops for a sparkling finish.
Ingredients
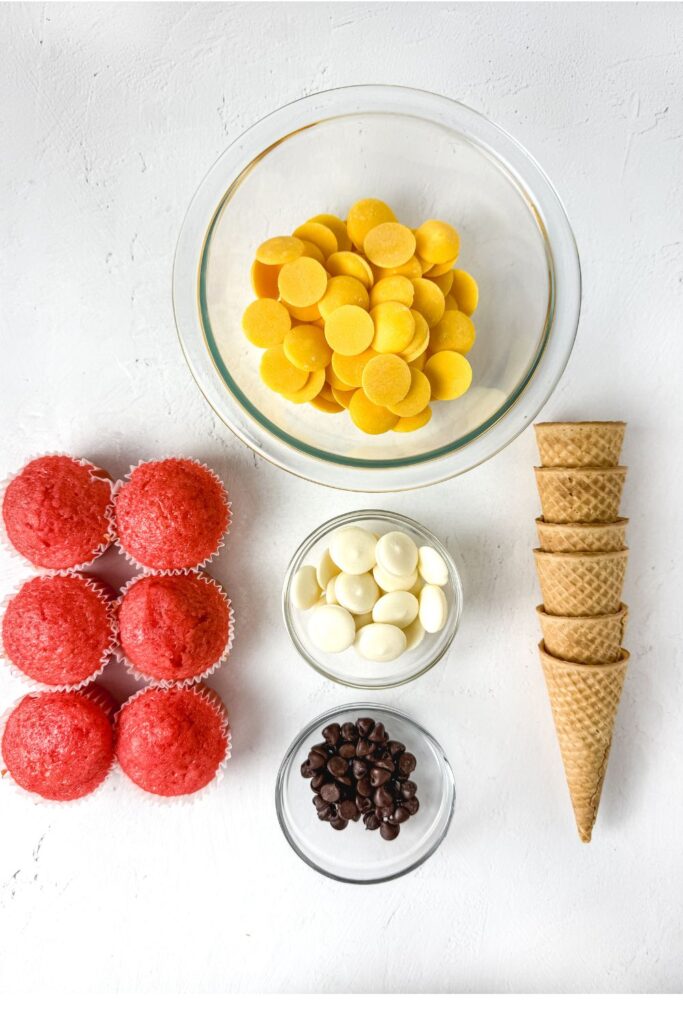
- 6 pink cupcakes, such as strawberry cupcakes
- 6 waffle cones
- 7½ ounces yellow melting chocolate
- 3 ounces white melting chocolate
- 2 tablespoons chocolate chips
Why the Main Ingredients Matter
- Pink cupcakes: The cupcakes form the erasers and provide the soft cake centre of the dessert.
- Waffle cones: The pointed cones create the recognisable pencil shape while adding a crisp texture.
- Yellow melting chocolate: This gives the cones their classic pencil colour and helps seal the waffle cones.
- White melting chocolate: The white coating creates the band between the pencil body and its pink eraser while also helping secure the cupcakes.
- Chocolate chips: Melted chocolate gives the pointed end of each cone the appearance of graphite.
How to Make Pencil Cupcake Cones
Prepare the Work Area
Line a baking sheet or your work surface with parchment paper. Make sure all bowls and utensils are completely dry before working with the candy melts.
Melt the Yellow Candy Melts
Place the yellow melting chocolate in a microwave-safe bowl. Microwave it for 30 seconds, then remove the bowl and stir thoroughly.
Continue heating in 30-second intervals, stirring after each interval, until the coating is completely melted and smooth. Pour the melted yellow coating into a tall cup to make dipping the cones easier.
Coat the Waffle Cones
Hold one waffle cone carefully by its pointed end. Lower the cone into the yellow coating with its open end facing down.
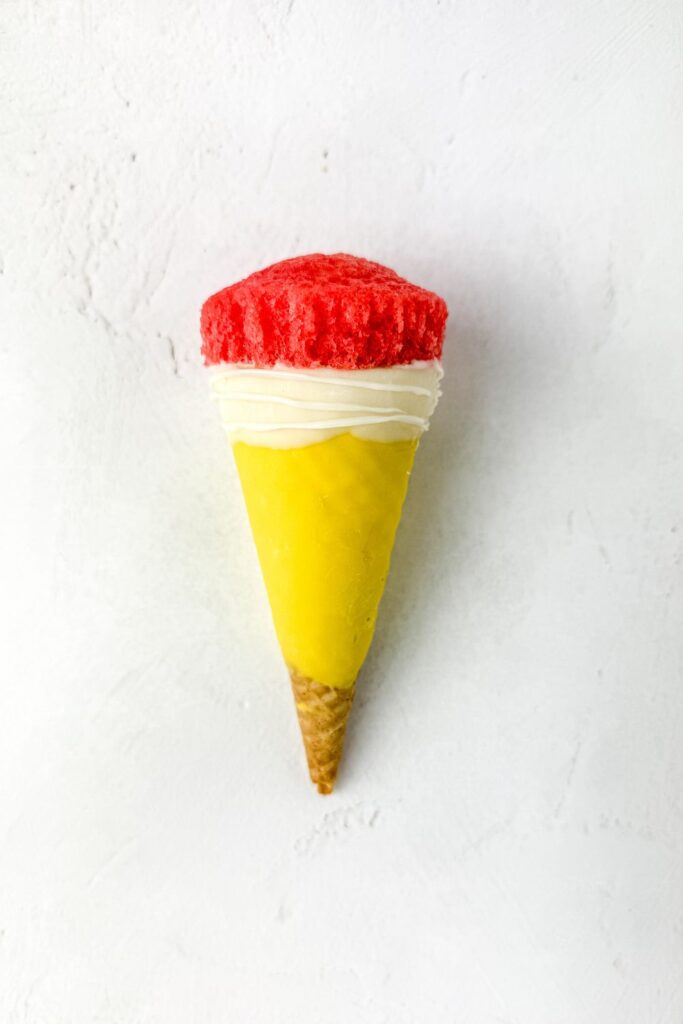
Dip the cone until the outside is completely covered, leaving the small pointed tip uncovered if preferred. Lift the cone and gently shake or tap off the excess coating.
Place the coated cone open-side down on the parchment paper. Repeat with the remaining cones, then allow them to set for 6–7 minutes.
Add the White Band
Place the white melting chocolate in a clean microwave-safe bowl. Melt it in 30-second intervals, stirring after each interval, until smooth.
Dip the wide, open end of each yellow cone approximately ½ inch into the white coating. Gently shake off the excess and return the cone to the parchment paper. Allow the white coating to set for 4–5 minutes.
Reserve some of the melted white coating for attaching the cupcakes.
Prepare the Cupcakes
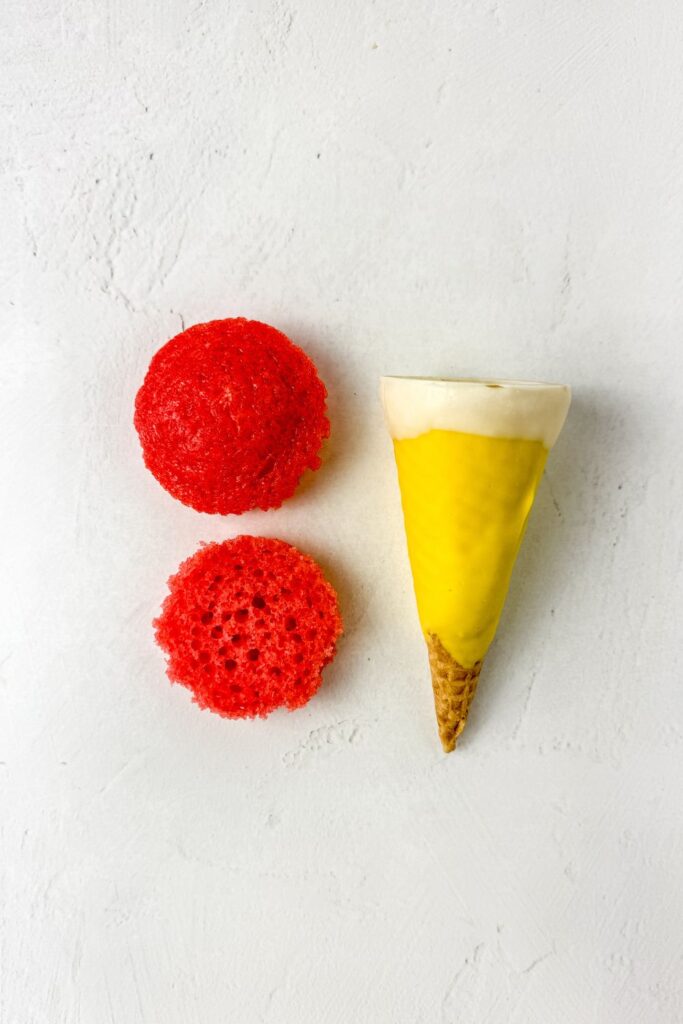
Carefully slice each cupcake horizontally through the middle. Gently press the bottom half of each cupcake into the open end of a cone.
If a cupcake is wider than the cone, trim around its edges before slicing it. Place any trimmed pieces of cake inside the cone.
Attach the Cupcake Erasers
Transfer the remaining melted white coating to a piping bag and snip a very small opening at the tip.
Pipe a ring of white coating around the open end of each cone. Place the top half of the corresponding cupcake over the opening and press it down gently to secure it.
If the cone is difficult to hold while attaching the cupcake, stand it upright in a tall cup. Allow the assembled cones to set for approximately 5 minutes.
Add Optional Details
For extra texture, pipe a few thin lines across the white section of each pencil. Allow the lines to set before handling the cones again.
Make the Pencil Points
Place the chocolate chips in a small microwave-safe bowl. Microwave in 15–20-second intervals, stirring frequently, until smooth.
Dip the pointed tip of each cone into the melted chocolate to create the pencil’s graphite point.
Allow the Pencils to Set
Lay the finished Pencil Cupcake Cones carefully on the parchment paper. Leave them for 3–4 minutes, or until the chocolate tips have completely set.
Serve and enjoy.
Alternative Pencil Cupcake Cones Preparation Methods
Microwave Method
The microwave is the quickest way to melt the candy coating. Heat it in short intervals, stirring frequently, until smooth. Avoid overheating it because this can make the coating thick or lumpy.
Double-Boiler Method
If you prefer not to use a microwave, place the candy melts in a heatproof bowl over a saucepan containing a small amount of gently simmering water. The bowl should not touch the water. Stir continuously until the coating is smooth.
Spoon-Coating Method
If your cup is not deep enough to dip the cones, hold each cone over a bowl and spoon the melted coating over it. Rotate the cone as you work, then gently tap off the excess coating.
Homemade Cupcake Method
Bake strawberry or vanilla cupcakes from scratch and tint the batter pink if necessary. Let the cupcakes cool completely before slicing and assembling the pencils.
Store-Bought Shortcut
Purchase unfrosted pink or strawberry cupcakes to reduce the preparation time. If only frosted cupcakes are available, carefully remove the frosting before assembling the cones.
Filled Pencil Cone Method
Before adding the cupcakes, partially fill the cones with mini candies, sprinkles, chocolate chips, marshmallows, or small cake pieces. Avoid overfilling them so the cupcakes can still fit securely.
Different Ways to Serve Pencil Cupcake Cones
- Pencil-cup display: Stand the cones in tall cups or jars to make them look like pencils sitting in a pencil holder.
- Dessert platter: Arrange the cones horizontally on a large platter, alternating the direction of the pencil points.
- Individual servings: Place each pencil on a small plate or inside a paper food tray.
- Back-to-school table: Serve them alongside alphabet cookies, apple-shaped treats, and school-themed decorations.
- Party favours: Place each cone inside a clear food-safe bag once the coating has set. Tie the bag loosely to avoid damaging the cupcake.
- Teacher appreciation treat: Present the pencils in a decorated container with a thank-you card for teachers or school staff.
How to Store Leftovers
Pencil Cupcake Cones taste best when served fresh. Store leftovers in a single layer inside an airtight container in a cool, dry place for up to 2–3 days.
Keep the container away from heat and direct sunlight, as warm temperatures can soften or melt the chocolate coating. Avoid refrigerating the cones unless the cupcakes contain an ingredient that requires refrigeration. Moisture in the refrigerator can cause the waffle cones to lose their crispness.
If refrigeration is necessary, place the cones in an airtight container and allow them to sit at room temperature briefly before serving.
Frequently Asked Questions
Can I make Pencil Cupcake Cones ahead of time?
Yes. You can coat the waffle cones up to two days in advance and store them in an airtight container. For the best texture, attach the cupcakes on the day you plan to serve them.
Can I use homemade cupcakes?
Yes. Homemade or store-bought cupcakes will both work. Make sure homemade cupcakes are completely cool before assembling the pencils.
What can I use if I cannot find pink cupcakes?
Use vanilla cupcakes tinted with pink food colouring, or coat the top of a plain cupcake with pink candy melts. You can also use red velvet cupcakes for a darker eraser colour.
Can I use regular chocolate instead of candy melts?
You can use white chocolate coloured with an oil-based or candy-safe food colouring. Water-based food colouring may cause melted chocolate to seize. Candy melts are generally easier to use because they set quickly and do not require tempering.
Why is my melted coating too thick?
The coating may have been overheated or exposed to moisture. Melt it slowly, stir frequently, and ensure all equipment is completely dry.
What should I do if my cupcakes are too large?
Carefully trim around the cupcakes until they fit the openings of the cones. Place the extra cake pieces inside the cones before attaching the cupcake tops.
How do I keep the cones steady while assembling them?
Stand each cone inside a tall cup or narrow glass. This will support it while you pipe the white coating and attach the cupcake.
Can I put treats inside the cones?
Yes. Mini candies, sprinkles, marshmallows, chocolate chips, crushed cookies, or additional cake pieces can be placed inside the cones.
Do Pencil Cupcake Cones need to be refrigerated?
They do not normally require refrigeration if made with plain, unfrosted cupcakes. However, cupcakes containing cream cheese, whipped cream, custard, or another perishable filling must be refrigerated.
How do I prevent the waffle cones from becoming soft?
Assemble the pencils as close to serving time as possible. Store them in a dry, airtight container and avoid humid areas.

Pencil Cupcake Cone Recipe
Equipment
- piping bags
- Microwave-safe bowls
- Tall cup
- Parchment paper
- Knife
Ingredients
- 6 pink cupcakes such as strawberry cupcakes
- 6 waffle cones
- 7½ ounces yellow melting chocolate
- 3 ounces white melting chocolate
- 2 tablespoons chocolate chips
Instructions
- Line a baking sheet or work surface with parchment paper.
- Place the yellow melting chocolate in a microwave-safe bowl. Microwave in 30-second intervals, stirring after each interval, until smooth.
- Pour the melted yellow coating into a tall cup.
- Hold each waffle cone by its tip and dip it open-side down into the yellow coating. Shake off the excess and place it open-side down on the parchment paper. Let the cones set for 6–7 minutes.
- Melt the white melting chocolate in 30-second intervals, stirring until smooth.
- Dip the open end of each cone approximately ½ inch into the white coating. Shake off the excess and allow it to set for 4–5 minutes.
- Reserve some of the white coating, transfer it to a piping bag, and cut a small opening at the tip.
- Slice each cupcake horizontally. Press the bottom half into the cone.
- Pipe white coating around the cone opening. Place the cupcake top over the opening and press gently to secure it. Let it set for approximately 5 minutes.
- If desired, pipe thin decorative lines across the white section.
- Melt the chocolate chips in 15–20-second intervals, stirring until smooth.
- Dip the pointed tip of each cone into the melted chocolate.
- Place the finished pencils on the parchment paper and allow them to set for 3–4 minutes before serving.
Notes
- Homemade or store-bought cupcakes can be used.
- If a cupcake is wider than the cone, trim it carefully and place the extra cake inside the cone.
- Mini candies, sprinkles, marshmallows, or other small treats can be added inside the cones.
- Place the cones in tall cups to keep them stable during assembly.
- Store leftovers in a single layer inside an airtight container in a cool, dry place for up to 2–3 days.
- For the crispest waffle cones, assemble and serve the pencils on the same day.